Showing posts with label DIY. Show all posts

Saturday, February 7, 2015

INDUSTRIAL PIPE SHELVING -OH HOW I LOVE YOU!!!

LOVE IT!
Hey there! So what are you doing this weekend? Well, let me tell ya about mine so far, because I really am just so happy with my Saturday project. The hubby and I spent this weekend working on a project I have been obsessed with lately. Obsessed! Industrial pipe shelving! I am just so in love with this. Although I realize I am probably a bit late to the party on this one, none the less I am hooked. I really wanted to be sure about this so I waited and waited…continually searching and looking at every Pinterest post I could find. I didn't want to do this unless I was sure, since it’s pretty damaging to the wall and not something you take down after a month or two. So once I knew I was sure, this weekend was the time....

I had a few things on my mind this week that I didn't want to focus on so I was looking for a project to take my mind off it. And this was it! Have I mentioned I LOVE LOVE LOVE this project? I mean I really think this is probably my most favorite project I have done in a long time. Maybe EVER…haha is that a bit dramatic?  Take a look! 
This project isn't exactly hard, but it is definitely time consuming and certainly needs your patience. (And a willing husband or partner helps).
We bought all our part at Lowes. The shelves were bought from their lumber section. We bought a 2 by 10 by 16 ft. length of wood and had it cut down to five 38 in shelves. The lumber for the shelves was only $14.52. Then we went over to the plumbing section and bought the lengths of black piping we needed, along with the elbows and flanges. We bought ¾ in pipe. That was the costly part. I haven’t added it all up yet but I would guess about $200. But considering for me it added tons of storage, it was well worth it. The piping is cheaper if you buy a 10 ft section and have it cut by them. The board we bought was actually only 9 ft in depth even though it says 10. But actually the 9 ft depth is what I really wanted. I left all the cutting and calculations up to my husband. I just knew I wanted 5 shelves with 1 shelf being 18 inches high and the others 12 inches high.
Believe it or not,
 these were the most pricey parts...the flanges.
About $5.50 a piece and we needed 12.
Once we got it all home I began the tedious part of peeling the pricing off each piece of pipe. Seriously, they put stickers with tape around each 10 inch section of pipe! What a pain.. And the hubby began his tedious job of measuring every thing out, setting up and drilling and measuring. We had a few trial and errors but the whole project (actually building it and installing) took about 3.5 to 4 hours.
Since I am not really good at step by step tutorials I will tell you that I just went on Pinterest and searched “industrial pipe shelves” and found zillions! I didn't really use a particular tutorial myself. I just looked at all of them, found what I wanted and showed my husband. We figured it out as we went. I will say this…put it together first on the floor how you want it and then lift to the wall and drill in place. And use screws with anchors in your drywall because it is heavy. But it is extremely sturdy.

I love the added storage these added and the look too!
I still have to stain the shelves a darker color but I couldn't wait to try them out. I decided to wait till we get a few warmer days in a row to stain them because I really want to do it outside due to the fumes. I’ll just take the stuff off then and do them. I’m also still arranging and re-arranging things on the shelf, but quite frankly, that the fun part! And oh my gosh, these will be so useful as extra pantry! The shelves look great I think but more than just aesthetics they hold a ton. So did I mention how much I love them?! J What do you think? Do you like them?
The shelves before loading. 
The shelves loaded up. :)

Thursday, April 24, 2014

20 SOME YEARS LATER AND MARTHA FINALLY GETS A FACE LIFT!

So this week I decided to give my "Martha Washington" sewing cabinet a much needed and belated face lift. These little stands were made popular back in the early 1900's when everyone was broke and manufacturers were looking for smaller wares to sell during the Depression. I bought mine in my hometown of Madison Ohio at a yard sale back in the 80's. They actually have nothing to do with Martha Washington and came along after her time. 
They sell on eBay, depending on the condition anywhere from

Thursday, December 5, 2013

YELLOW! -The new little black dress for decorating!

Isn't this little darling of a lamp gorgeous?? Don't you just love this yellow lamp??? Well, I do. I am doing my family room in black, white, charcoal grey and YELLOW! Who'd of thunk it? And because my family room is the great room that opens to the kitchen, my kitchen is following along. I remember reading a loonnnng time ago (before decorating blogs existed and I felt alone in my world obsessed with HGTV)) that every room should have a touch or whimsy (the owl) and/or a touch of yellow. It makes your room happy. Well, it does makes me smile. I walk into my living room or kitchen now and actually smile. I love the happy yellow. So I have always done that. A touch of whimsy or yellow. Mostly when it came to yellow though, I used flowers in the room.  Because I never really thought of yellow as a design color for accents until the past year. Now of course it's everywhere I look. I always ask myself why is it that when I choose a color for a room....it seems like everybody else jumps on board. (I did think of it first right? I didn't just jump on board myself did I?!! Oh my....)
Well, anyway..YELLOW it is. Mostly I am going with a "mustardy" color. That's a word, right? And thanks to the wonderful world of spray painting EVERYTHING it no longer matters what color something is when I buy it!
I bought this adorable little red lamp from Hobby Lobby just before last Christmas. (Sorry about the horrible "before" picture...(new camera is on it's way!)

I toyed with the idea of red as my accent color but could never quite get on board with it. And believe it not, red didn't "pop" in the room at all. I even bought some other items that day that were red. (Now yellow). I left them red during the holidays and then made the switch. I am horrible with "before" pics. Just as I am finishing up a paint job, it's always... "Ah geez, I forgot to take a picture!". So this is the best I can do for the before. It was cute -just not what I wanted.

So...don't let color hold you back when you see something you love in the wrong color. If it's a paintable surface -paint it! And believe me, this lamp does not look like it was "painted". Even up close in person, it looks like I bought it yellow. So thank you Lowes for a wonderful assortment of spray paint colors!!!!!!!!!!!

Wednesday, November 6, 2013

WHAT A DIFFERENCE A DAY MAKES!!! ( And 30 bucks! )

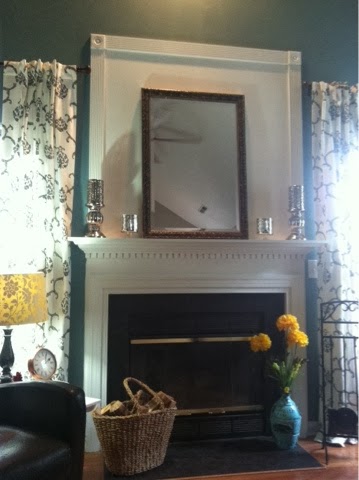
YES!!! ONE DAY LATER... AND MY FIREPLACE LOOKS LIKE THIS....!!!

LOVE LOVE LOVE LOVE LOVE....DID I SAY IT ENOUGH???????


INSTEAD OF THIS PLAIN JANE LOOK THAT IT HAD YESTERDAY !!!  


YAY! Love it!
AND IT COST JUST UNDER 30 BUCKS!!!  And let me tell ya...

Tuesday, November 5, 2013

Fireplace Mantel Surround


I can't wait! Tonight I am starting on my new fireplace "surround". My fireplace is very bland with just the wall above it. None of that beautiful white moulding. My daughter has an amazing white surround and crown moulding around hers and it looks beautiful. I always wanted mine to look like what I saw it pictures and then when she bought her house it definitely made me want it more! So, thanks to the internet and Pinterest ideas...... It starts tonight. :)
HERE'S THE BEFORE....


STAY TUNED FOR THE AFTERS TO BE PUT UP HOPEFULLY TOMORROW.... 
AND YOU CAN SEE THE AFTER HERE

Friday, October 25, 2013

Transitions....

SO THIS IS WHAT MY FAMILY ROOM LOOKS LIKE NOW.....
When we bought the house back in October 2007 the walls were barren white and the floor was ugly  uh..not very pretty. Sorry just not my cup of tea! And the furniture was just a mish mosh of different things. It's a good size house so I am still working on it. This room has gone through so many transitions and different looks but here is the beginning and then.... 


 AND THEN WE DID THE FLOORS.....


WELL MICHAEL WITH MAD HOME IMPROVEMENTS DID......

 AND THEN WE HAD NEW FLOORS....AND IT LOOKED LIKE THIS!!!

THIS IS HOW IT LOOKS NOW! I LOVE MY NEW DRAPES, NEW FLOORING AND THE COLORS....IT STILL NEEDS LOTS OF TWEEKING BUT IT IS NOW A ROOM THAT FEELS COMFORTABLE AND INVITING...
THE ONE THING I DESPERATELY NEED IN THIS ROOM IS A RUG AND I CAN'T MAKE UP MY MIND ON WHAT I WANT SO THAT'S IN THE WORKS. DO I GO BLACK? DARK CHARCOAL GREY? LIGHT GREY? YELLOW WOULD BE GREAT BUT I HAVE DOGS SO..........

A CLOSE UP OF MY NEW "IMPRESSIONS" DRAPES (that I spent way to much on- but then I found them on overstock for a good price too) AND THE FIREPLACE THAT WAS IN DESPERATE NEED OF HELP. :(

BUT WE FIXED IT!!! YAY!!!!!!!!!!!!!!!!!!

SEE HOW WE DID IT...HERE   STILL HAVE WORK TO DO ON IT. I REALLY NEED TO FIGURE OUT THE DECOR FOR THE MANTLE.  THATS IT FOR NOW. I WOULD LIKE TO EVENTUALLY DO SOME CHAIR RAIL AROUND THE ROOM.....

Sunday, September 8, 2013

Re- purposing. Just about anything can be made new again.

I re-purposed a bunch of items to show and of course I forgot to take some of the before pics. :(  Kinda ruins everything. But here are a few pics of some very easy cool things! See the lamp on top of the little buffet? Well that belonged to my mom and has been sitting in my garage, and the garage before that for about 20 years. It was brassy gold, and the lamp shades had broken. I brought it in one day and decided to fix it up. I searched online till I found white "milk glass" lamps shades that were very similar to the originals. They were actually fairly cheap too. I think they were like $35.00 each. When they came in I picked up some pewter spray paint and Voila! like new! Actually better, since they weren't brassy any more. :)
Here is the website where I found the globes in all different styles....  http://www.lampsplus.com/

And the speaking of the little buffet table. I found it in a second hand store for $60.00 buck I think and loved it. It was a bright neon blue and didn't work for me. So I painted it green and although I really liked the color I changed my mind on it. so............BEFORE. I love the green but I needed it to be neutral...so............
I WENT WHITE!!!


So how about those expensive small appliances that you see in magazines. They always have them to go with their decor and they cost a small fortune!!!! Again, PAINT your own!

I got these chairs from a neighbor who refinished chairs years ago. About 10 I think. I took the seats off (which is very easy to do) and recovered them with a textured material. Kind of like burlap feel, but softer on the bum. Sprayed them with scotchguard too. I have a huge family...so LOTS of scotchguard. And I painted the chairs with a spray paint. Just took them outside without the seats and sprayed them down. Very easy and it really gave them a new life. They go with my redone kitchen now! More of Cottage feel. Although I just took a test online at Better Homes and Gardens and it said my style was "Polished  Casual" hmmm... I like that. Find out yours.... http://www.bhg.com/decorating/decorating-style/quiz/


BANG FOR YOUR BUCK!!! A Kitchen Re-do!

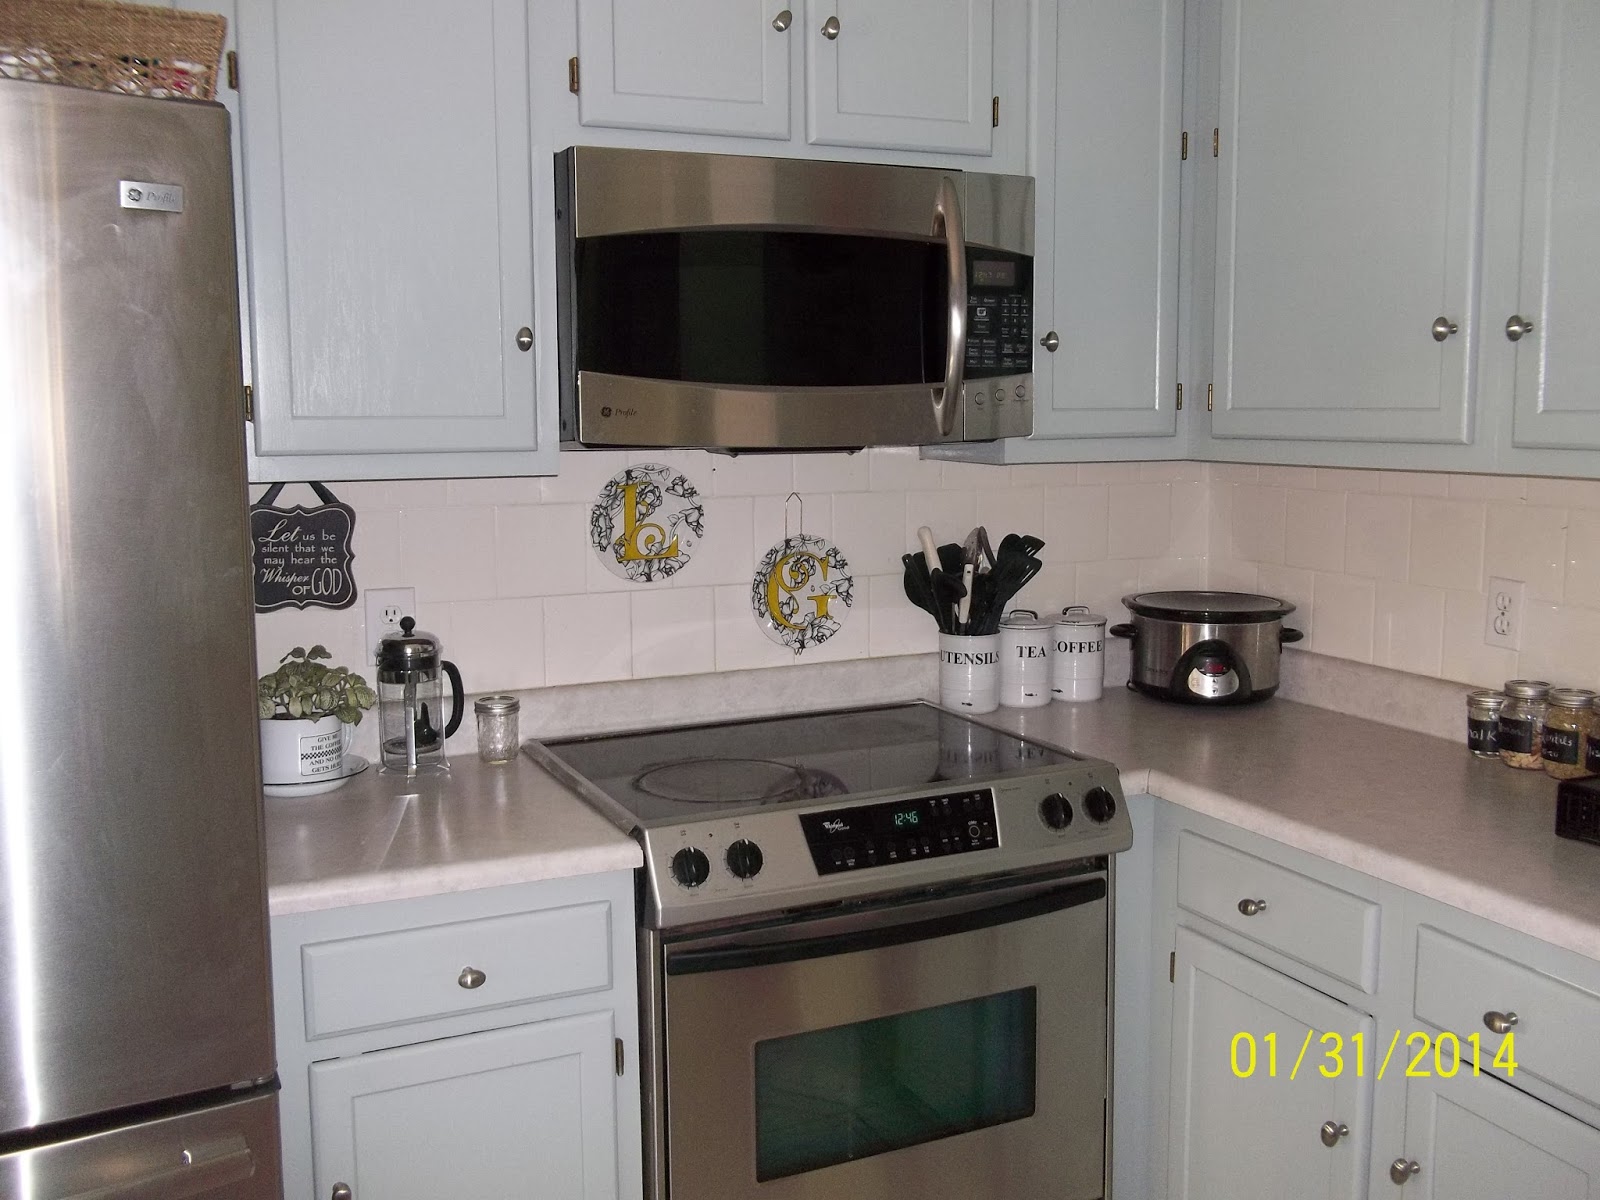
The big job that I have been putting off is my kitchen update.  I don't plan on doing a kitchen "remodel" with new layout and all that. -My kitchen layout is fine for this house and it can't really be changed without some major structural re-configuring. And we aren't sure if this is our "forever" home or not. If not, our next one definitely will be. But until we figure that out, I just wanted to upgrade my kitchen. And get new appliances. Because I hated the way my cabinets looked!  But I love how they look now! This is how great they turned out!!! And ya don't have to spend thousands of dollars to give your space a simple facelift. New appliances were a bit pricey but painting the cabinets was truly the biggest change for the least amount of money. 
                          Take a look now!!! I just love it!


AND ANOTHER CLOSE UP OF THE COLOR...


from this.... 


to this....


AND HERE ARE SOME OF THE BEFORE AND DURING PICTURES.......